

Yes, you read that title right. Hello lovelies. Last night, I made, what quite possibly may be the best cupcake ever. Well, if you love snickers then you will love these. The last cupcake post I did, the cannoli cupcakes, I was so happy with how amazingly light, fluffy and moist that, that cake had come out, so I decided to use that recipe as a base to the chocolate cake. I followed the recipe exactly how I did last time with two changes. The two changes were that 1. I doubled the recipe to make 24 instead of 12. And change #2. was I added 1/4 cup of cocoa powder.
USEFUL TIP! : To get a nice fragrant chocolate cake, dissolve the cocoa powder in hot water, and then add it to the cake, it makes the chocolate pop. So instead of going step by step into everything I'm just going to throw the recipe out at y'all and some photos. :) This is the original recipe doubled, so the recipe you see below as follows will give you 24 cakes.


USEFUL TIP! : To get a nice fragrant chocolate cake, dissolve the cocoa powder in hot water, and then add it to the cake, it makes the chocolate pop. So instead of going step by step into everything I'm just going to throw the recipe out at y'all and some photos. :) This is the original recipe doubled, so the recipe you see below as follows will give you 24 cakes.
Ingredients
- 3 cups cake flour
- 3 tsp baking powder
- 1/2 tsp salt
- 2 cup granulated sugar
- 1cup salted butter, at room temperature
- 4 large eggs
- 1 tablespoon vanilla extract
- 1 cup sour cream
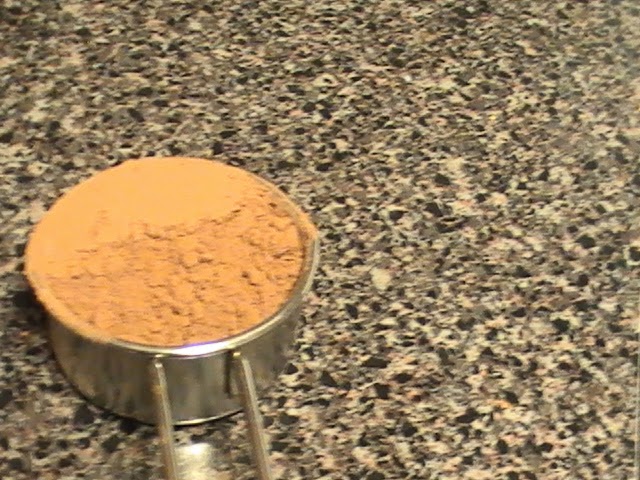
- 1/4 cup cocoa powder dissolved in 1/4 cup very hot water
Directions
- Preheat oven to 350 degrees. In a mixing bowl, whisk together flour, baking powder and salt, set aside. In the bowl of an electric stand mixer fitted with the paddle attachment, whip together butter and sugar on medium high speed until pale and fluffy, about 3 - 4 minutes, occasionally scrapping down the sides of the bowl. Stir in eggs one at a time mixing until combine after each addition. Mix in sour cream and vanilla. Mix in cocoa powder dissolved in hot water. With mixer set at low speed, slowly add dry ingredients and mix just until combine, scraping down sides and bottom of bowl as needed. Divide batter among 24 paper lined muffin cups, filling each cup about 2/3 full (about 1/4 cup batter per each). Bake in preheated oven 21 - 24 minutes until toothpick inserted into center of cupcake comes out clean. Mine took 20 minutes. Allow to cool several minutes before transferring to wire rack to cool. Cool cupcakes completely.
Now, while your cakes are baking, it is time to start on the caramel filling! Mmmmm! Ok, I found this caramel and icing recipe here, and I was really curious about it because I had never seen caramel made this way before and with brown sugar. It came out pretty good. For the caramel sauce we need 1 cup of butter, 1/2 tsp salt, 2 cups firmly packed brown sugar, 1/2 cup it says milk, however I used heavy cream, and 2 tsp vanilla extract.
First melt your butter in a saucepan completely.
Once melted add in the brown sugar and salt. Stir constantly and bring up to a boil.
A good tip is to have a pastry brush and a side of water on hand, to brush down the crystals on the side of the pan, that way the side crystals don't burn and mix in with the caramel adding a burnt flavor. Stir this constantly and never take your eye off of it. When it comes to a boil, boil for about 2-3 minutes, you can smell it when it's ready. I know you'll be temped to try it, DON'T TRY IT! IT WILL BE VERY HOT, SUGAR IS LAVA WHEN HOT!
Now, it is time to add the cream and the vanilla, I added the vanilla in with the cream ahead of time, as well as combined my salt and brown sugar together, it is just easier that way.
After adding the cream and vanilla, bring it back up to a boil for another 2 minutes.
Afterwards take it off the heat, give it one final stir, and let it sit until cooled completely. It will thicken as it cools.
While caramel is cooling, the cakes should be about ready to come out of the oven, so now we can take the cakes out and let those cool along with the caramel sauce.
I like to leave the oven on, and set my butter for my icing on the oven, it helps to warm it to room temperature, just flip it a few times throughout.
While everything is cooling, and the butter is warming up, it is time to cut up the garnishes. Also I think the garnishments really bring it together, and makes you realize hey this is a familiar flavor, what is it, oh yeah a snickers bar. Ok, so time to chop up some honey roasted peanuts and some fun sized snickers. I wanted to put two slices of snickers on each cupcake, so from one fun sized bar I got four slices out of it. For the peanuts I just did a rough chop, or a mince. Nothing too big, but not too small.
Now, this is what the caramel looks like cooled.
You're going to want to transfer the caramel to a squeeze bottle, I am using one from wilton, now make sure it's cooled completely, I made the mistake of putting it in too hot and it burnt through the lid and exploded on me, not fun. ha. Once cooled, and prepped up (the best way is through a food funnel), now you can either core your cupcakes, or if you're like me and don't like losing the cake just pop the opening of squeeze bottle in the cakes and squeeze until it comes out of the top a few times, or 5, throughout the cupcake.
Once they are all filled, now it's time for some buttercream. Ok I had problems with this, and it was a recipe I found from here, it was way too sweet, but adding caramel to an already sweet buttercream is just going to add sweetness. I should have thought about that before going with it. But I fixed it! So I creamed 1 cup of butter, 4 cups powdered sugar, added about 1/3 cup of caramel and 1 tsp vanilla extract. It was too sweet so I added about 2 teaspoons lemon juice, 2 teaspoons of salt and about a 1/3 cup of peanut butter, it was too thick so I added some milk, too much, then it was too thin, so more powdered sugar, now too sweet, more lemon juice and salt. Finally it tasted good, I iced my cupcakes, added the garnishments, then topped them off with a sprinkle of salt to once again cut the sweetness. These ended up being absolutely amazing even through the trial and error with the icing. So I apologize, I don't have an actual icing recipe, it was a challenge. Next time I think I'll just use my base that I know and love.
Enjoy if you make these. :)


No comments:
Post a Comment